
 Spring is Mother Nature’s payback for her debt of winter. The first bright, balmy days coax tulips from the wet ground, grass springs to life with the first warm rain, and invariably your neighbor fires up his old lawnmower just to be sure you didn’t forget the joys he and his Briggs & Stratton dole out for anyone in a half mile radius. No worries though; spring is the season of eternal hope when all is right with the world and many people long to plant something of their own in Mother Earth to watch it grow. It may be an instinctual force that harkens back to our hunter / gatherer days, but thankfully today we’ve got better tools to help us. When it comes to putting in a garden or wildlife food plot for hunting, there are few better tools than your ATV or UTV, and we’ll tell you how to get your crop started. Regardless of what you intend to grow, the methods and tools for a successful crop are the same whether it is a 200 acre field, a two acre food plot for hunting, or a home vegetable garden. At ATV Illustrated we’re one with the land, not in an eco-nut sort of way, but growing up and living on a farm has taught us a thing or two about farming.
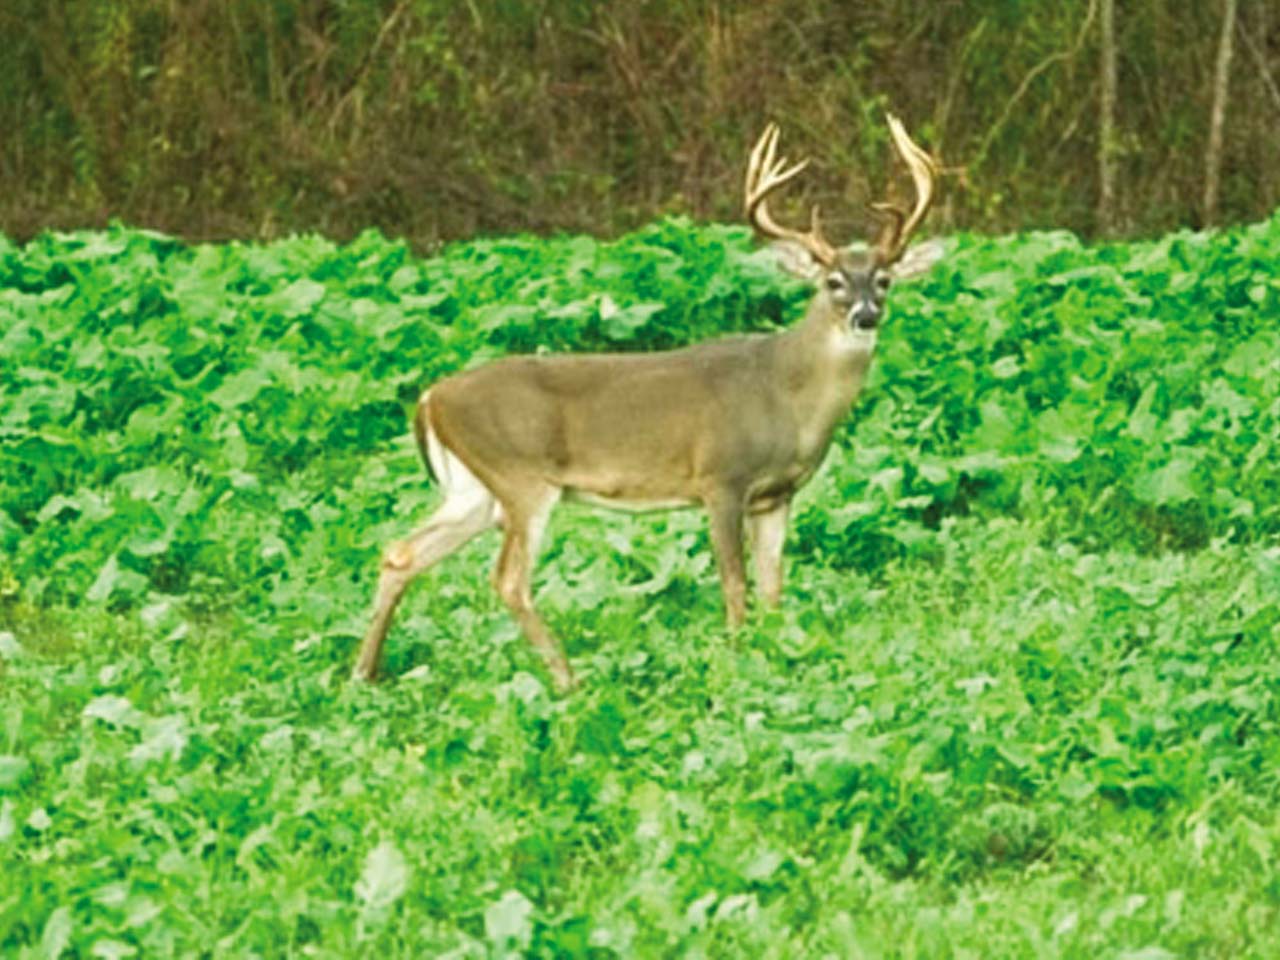
Wildlife food plots are typically planted to provide cover and a healthy food source for animals. Deer love beets, carrots, alfalfa and beans, but they feel much safer in taller plants like corn, millet, and sorghum where they can remain unseen. If you’ve got several acres, plant a good sized stand of corn with secondary crops around the outside. Game birds benefit from corn and similar crops as well, but they feel safer in tall, thick stands of grass and bean fields. Give birds more grass cover and some crops which will drop kernels throughout the year as a food source. Locate the plot near cover or bedding areas where the animals feel safe, and remember to plan for several stand locations that allow for wind changes on hunting days.
When it comes time to plant a garden, you want to do almost the opposite, discouraging wildlife by keeping neatly spaced rows with good weed control and few places for critters to hide and find a free lunch from your efforts. Here are the tools and steps to getting a good stand started.
QUADIVATOR – Best in the Field
There are many ground working tools to pull behind your ATV or UTV that can help with your food plot or garden, but they all fall into a few categories: mowing, cutting, ripping, or turning.
Undoubtedly you’ve seen all types of pull behind implements, and you’ve probably come to the same conclusion we have; that you’re better off with a good hoe than most of them. Pick these tools just like you did your ATV; for reliability, usability, and the ability to get the job done. One brand we trust is Quadivator.
Quadivator has been building pull behind tools for ATVs for many years, and they’ve expanded the lineup to include Side x Side tools as well. The thing we like about all of the Quadivator tools is that they are well designed, built solid, and will hold up to years of use in the field. All ground contact parts such as tines, moldboards, and shovels are Ag quality common parts that can be replaced easily when they finally wear out, although unless you’re putting in every food plot in the county we doubt you will. Essentially the Quadivator tools are smaller versions of the same plows, planters, field cultivators and harrows you find on every modern farm, but scaled down for the pulling capability of an ATV or UTV. They’re tough and they last!
Mowers:
Most ground breaking tools work very poorly when the ground is covered by tall grass or sod, and a mower can cut it down to size making the next task much easier. If your plot is covered in grass or any other cover, mow it first and, if possible, let the stalks dry completely before working further. They’ll cut up more easily this way.
Turning - The Plow
Plows have been a primary farming tool for centuries, but today they are used only when it’s really necessary to completely turn over the soil. If you are working a new plot and have to mow off the existing grass, a plow can be a BIG help in turning the existing sod down and getting you to bare ground quickly. Green sod plows very hard thanks to long roots, however, so it’s much easier to do a good job if you’ve first killed existing grass with a healthy dose of Roundup and by mowing.
Cutting - The Disc
A disc does an excellent job of cutting existing stalks and when a couple passes are made, a disc will also help turn up roots to kill the plant in place of spray. When repeated over time, a disc will definitely get the job done, but it’s not as fast as spray. After plowing, a disc is also a great tool to help level out the field and get it in better shape for planting.
Ripping & Finishing - The Field Cultivator
No farm is complete without a field cultivator these days and they are a multi-function tool that can both rip deeply to work out weeds or existing cover, or they can be a finishing tool when used lightly as a final pass to prep the seed bed. If we were only going to own one tool, this would be it, especially when using Roundup or chemical weed control first.
ATV & UTV Prep
When working the ground, the ATV or Side x Side will have a good sized load to pull, and just like with racing, for serious work horsepower is king. To protect the clutch and belt ALWAYS pull a heavy load with the transmission in “Low” for maximum torque and don’t drive too fast. A good walking speed will be about right when working up the ground and driving too fast will usually throw dirt everywhere and create an uneven plot.
Now that you know the tools, here are the basics of how to work your field.
1. Get Weed Control
Before you can hope to establish a healthy stand, you must get control of any weeds. Most farms rely on Roundup and it’s a potent weed killer, but it must be applied to the leaves. Spray at the mixture directed on the label and on a calm day, to prevent drift, and do NOT spray when it will rain within the next few hours. The Roundup needs a couple hours (or better yet an afternoon) on the weeds without being washed off by rain to work best. Spray at least a week before you intend to work the ground to get a complete kill. You’ll know in a couple days if it worked when the leaves begin to curl, and in a week the results will clearly show.
The other method of weed control is to tear out the existing weeds by working the ground. This effectively uproots the existing weeds, depriving them of moisture; however, to make this method work you will have to work the field many times over several weeks to insure the weeds do not re-root themselves. Regardless of which method used, you will almost certainly have some weeds because there are undoubtedly many years of weed seed already in the ground, and the wind will carry in seeds from other areas. Weed control is an ongoing battle, but a necessary one to insure a good stand.
2. Don't Work It Wet!
One thing you do not want to do is work up the ground when it is still too wet. When you turn the ground over, grab a handful and squeeze it like you are trying to make a small snowball. If it crumbles or won’t stick together, it’s dry enough to work up the rest of the field. If it sticks together in a mud ball, it’s too wet. Working any ground too wet creates millions of little mud balls that eventually turn hard as rocks when they dry, and it’s very difficult to establish a nice seed bed in them. If it sticks to the tires or you can make a mud ball it’s too wet!
3. Create the Seedbed
After working the ground the first time, it’s usually best to let it dry for a day and then rework. You won’t need to go as deep the second time and it should provide a much smoother, more uniform surface, possibly ready for planting. Should you need to work the ground again, drive in a different direction or at an angle to level out the surface and to further work the seed bed smooth.
4. Plant and Play
With the seedbed prepared, planting can begin either in rows, or spread with a broadcast style spreader for a complete ground cover crop like alfalfa or clover. Row crops can be planted to the depth specified for the seed, and cover crops, like clover, alfalfa, or grasses, can be broadcast and then covered with a light coating of soil by using a drag/harrow.
From Plot to Plate
Your ATV or UTV can be an excellent tool to successfully plant a wildlife food plot or garden. Applying a little fertilizer as recommended from your Co-Op or feed store will help it along, and an occasional rain will do wonders. In the fall, harvesting a few luscious vegetables and tasty wild game is another reward you can look forward to.
 |
 |
 |
 |


